Wednesday, October 24, 2018

How to sew Christmas stocking for Advent Calendar

This is a lovely fabric from Makover. It has pre designed panel Christmas stocking and cutting line to help you get the right size. Each stocking has a different design and a number, so you can use them for an Advent calendar.


Here it is my tutorial. In fact it is not a tutorial, but I tell you how I made it.


It is nice that the fabric has even the how to steps printed on it. 


I cut all the stockings. Because I wanted to use different colored fabric for background, not just a single color for all the pieces, I cut the background fabric separately. 


I sew the top edge of every stocking. For the back, I sew the ribbon too. 


Then I put together a face and a background, wrong side to wrong side, and I sew on the edges. 


That's all. 24 mini Christmas stockings for an Advent calendar for kids. They can be hang on a bunting or they can stand alone. Ready for fill them in with sweets. A countdown calendar is a good method to teach your kids how to count, or to place in order the numbers. 


If you don't have for making an Advent calendar, you can buy the single one that I made. Visit My Etsy Shop Here.

Ema 


Thursday, October 4, 2018

Halloween witch house ornaments

Ready for Halloween? Look at my felt houses. Black houses with colored windows.


I made them without a pattern. Just cut, cut, cut and sew, sew, sew. Fun! 


I put them a ribbon for hanging. It is easy to sew them. Make some felt houses, different colored or black or purple. For Halloween or for other occasion. 

You can buy a set of 6 felt houses in my Etsy Shop - Halloween Houses. 

Ema

Tuesday, October 2, 2018

Spiderman Round Pillow

Make quickly a round pillow for your little Spiderman. This is an easy sewing tutorial for sewing by hand a fleece pillow.


Materials: fleece double side red and black, thread, black embroidery thread, white felt, filling, white paper and a pencil, a round object with a 28 cm diameter .

I like to use double faces fleece because it is easy to sew and it fits to many projects. In this case, red and black fleece.
I have traced 2 circles on the fleece and I have cut them. I have drawn the eyes, 2 big black shapes like a tear drop and 2 white.


I have placed the eyes on the pillow and fixed them with pins. Then, with a pencil, I have traced the spider web lines. 


I have used black embroidery thread to sew the lines with simple stitches.


I have sew the white eyes, then the black ones on the pillow. 


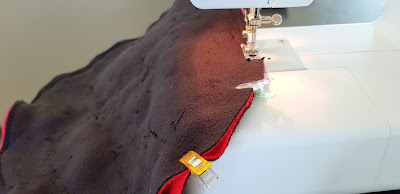
I have put the both faces of the pillow face to face and I sewed at machine on the edges, leaving a small place to turn it. I turned it and I filled it with anti bacterial filling, then I sewed by hand the edges.


This is the Spiderman round pillow from fleece. Soft and cozy. For your kids.

Ema

Monday, October 1, 2018

Wall Clock for Kids - a felt board

How to make a wall clock for kids. This is a felt board, a clock with detachable numbers and movable arms.


Materials: 2 felt sheets (24 x 35 cm), colorful felt for details and numbers, assorted thread, a button, scissors, Velcro, a tiny bell, ribbon.
I sew this board only by hand. It is a project for intermediate level and it is an easy sewing tutorial.

I make the round for clock to fit in my page. I used yellow color for contrast. I cut the small pieces without a pattern: the bird and her wing, 2 circles for the sun, some round pieces for flowers, leaves, a brown branch, the caterpillar. I will post later the pattern for the hands and numbers.


For the numbers I used some traced pattern that I made in a Word sheet, printed and cut. 


I sew Velcro squares on the clock for numbers. For the numbers, first I sew the Velcro on the back, then I sew the both pieces for each number.


I sew the details: the sun, the bird, the flowers. For the bird, I attach a tiny bell in the beak. 


For the caterpillar I cut 5 green circles and I sew them. Then I make with black thread the eyes, the mouth and the antennas. For the flowers: I sew them only in the middle with yellow thread. 


The hands: they have different colors. I cut them and I make a button hole at the end. I sew the button on the clock. The hands are movable. 


Last step: I sew together the both sheets of felt with blanket stitches on the edges. But First I place the ribbon for hanging. 


This is the clock. Make one for your kids. Use your design, add your details. 
If you want to buy a wall clock for your children, please visit my Etsy Shop - Felt Wall Clock


Happy sewing!
Ema


Penguin Toy

A new penguin toy in my collection. Soft and fluffy, I made him from two different fleece. My daughter said that fleece from his belly is a...