Friday, October 28, 2016

Cross Stitch Bookmark Tutorial

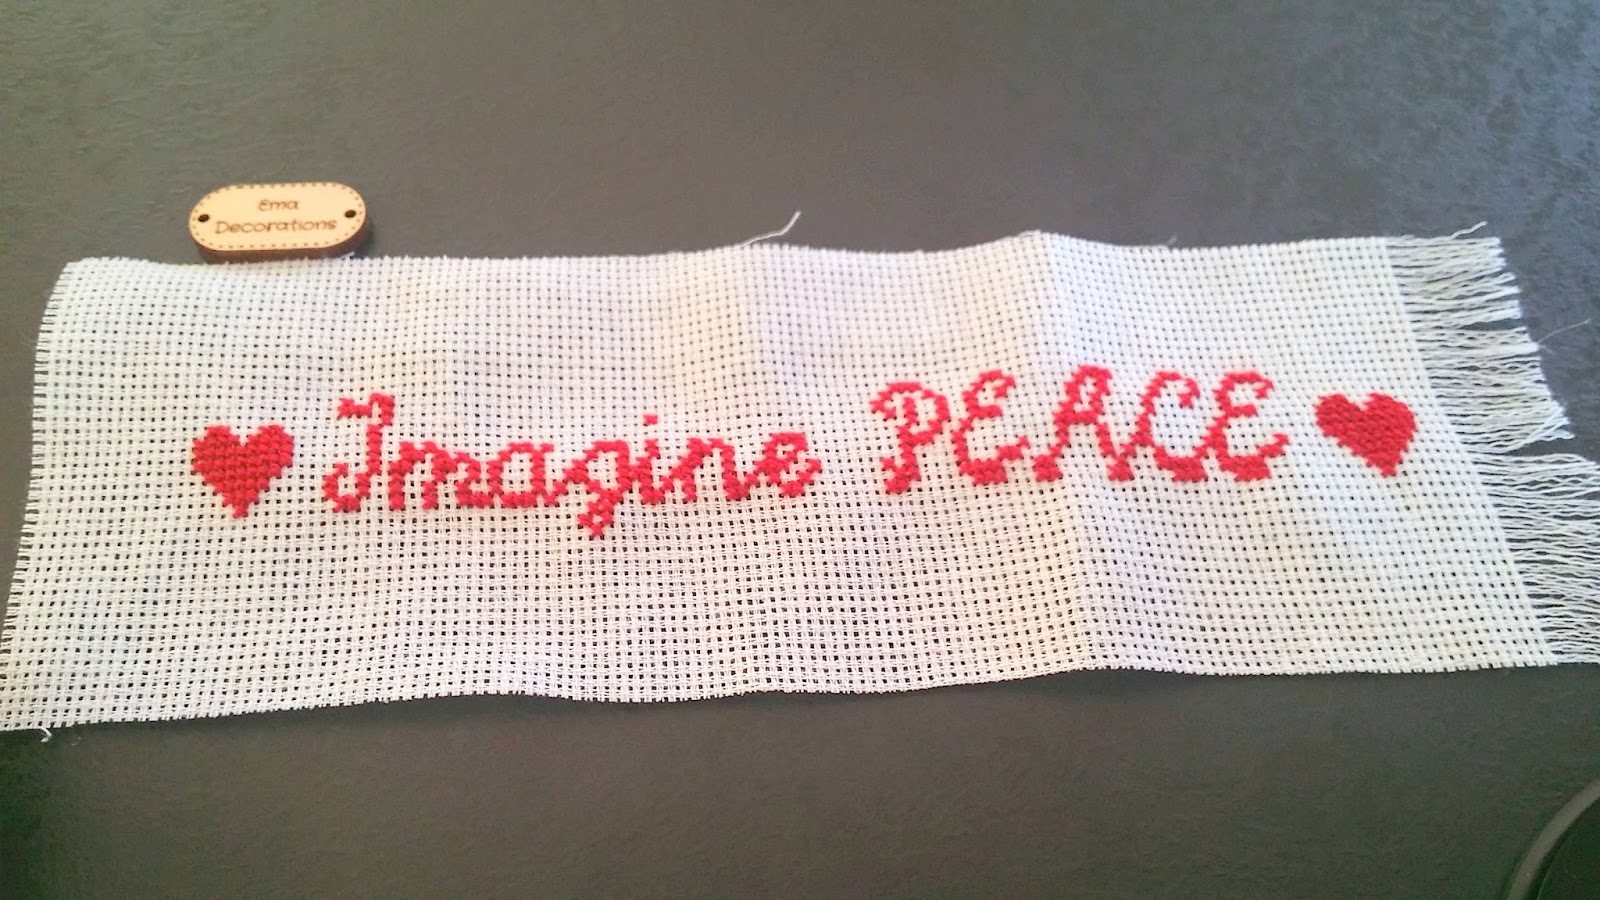
I made a cross stitch bookmark for a lovely person. She wanted to write Imagine Peace built by Yoko Ono. I show you in this easy tutorial how to make one bookmark for you.


If you know how to write the letters using cross stitches, that's fine. If you don't, use an online cross stitch writing tool. I like StitchPoint.


I sew the words Imagine PEACE and I added two little hearts. Here it is a short movie.


The fringe - Here it is how I made the fringe. I pulled apart the threads from the ends, using a needle. Be careful, they need to be the same size.


I made an edge to sew it.


I cut a piece of white felt for the back.


I sew the bookmark and the felt together, on the edge, using blanket stitch.


And this is the cross stitch bookmark. Make one for a special person in your life. Choose some words with a special meaning, a quotation.


Happy sewing.
Ema

Thursday, October 27, 2016

Mandala crochet bag free pattern

Make a mandala bag for your girl.
This is a free pattern for a mandala crochet bag. You can use what yarn you want and a proper hook.
Yarn - I used Charly yarn from Phildar: ligh and dark pink and grey - 1 skein of each
Hook no 6

Stitches:
single crochet - sg
double crochet - db
slip stitch - ss
chain - ch
You will work in round and you will join every row.


r1 - with pink - chain 3 (count it as the firs dc), make 9 dc into the ring, join with slip stitch (ss) in top of the ch 3 - you have 10dc


r2 - ch 4 (count it as the first dc and ch 1), *make 1dc in the next dc + ch 1* - repeat between ** 9 times, join with ss in the 3rd ch of the beginning 4th ch

r3 - with grey - ch 3, 1 dc into the base of ch 3, ch 2, *2dc in the next dc, ch 2* - repeat between ** 9 times, join with ss in the beginning of ch 3


r4 - ch 3, 1 dc into the base of ch 3, 1 dc into the next dc, ch 2, *2dc in next dc, 1dc in next dc, ch 2* - repeat between ** 9 times, join with ss in the beginning of ch 3


r5 - with dark pink - ch 3, 1 dc in next dc, 2 dc in the next dc, * 2 dc into next 2 dc, 2dc in the next dc** - repeat between ** 9 times, join with ss


r6 - shell stitches - ch 3, 2 dc in the base of ch 3, ch 1, skip 1dc * 3dc in next dc, ch 1, skip 1dc* - repeat between **, join with ss
r7 - with light pink - ch 3, 1 dc in next dc, 2 dc in the next dc, * 2 dc into next 2 dc, 2dc in the next dc** - repeat between ** 9 times, join with ss


r8 - with grey - ch 3, 1 dc in every dc until the end, join with ss. Finish off. 


Make two parts for this bag. 
Tight the long tails on the back of every part, hide the tails using a hook or a needle. 


Here are the 2 parts. Even if I worked with the same hook and in the same day, the second part was smaller. I made another round with light pink with simple crochet in every stitch. Every part is almost 9 inches (22,5 cm) in diameter.


The part between the 2 parts of the bag - you have to sew it at the ends. I made it with grey yarn - ch 7, 1 sg in the 6th stitch from the hook, sg in every st, ch 1 and turn. It has almost 22 inches (56 cm).

Pin the grey part between the 2 mandala parts and crochet them together on the edges using single crochet. 


The handle - I used pink and light pink for the handle. I made it in the same way as the grey part - ch 7, 1 sg in the 6th stitch from the hook, sg in every st, ch 1 and turn.It has 40 inches (100 cm). I made a strip from fabric with sewing machine and I sew it on the handle. In this way the handle will not stretch out. 


I sew the handle at the end of grey middle part. 


Because the mandala crochet bag has some holes, I sew fabric inside. 


Happy crochet.
Ema 


Wednesday, October 26, 2016

Learn to sew - Kids Sewing Machine

If you have a 10 years daughter, you know that all her dolls need clothes. Many clothes! My 10 years daughter made some experiments trying to create or to sew by hand some tiny clothes for her dolls. It is hard to sew by hand when you are a little one and your hands are not used to a needle. 


Today we sewed by sewing machine. She wanted to make some pants and T-shirts. We use an old pair of black leggings. She searched on the Internet how to make the pants and she came to me with her tablet to show me. Cute. 


We followed the steps and we trace the lines, cut the shapes and then she wanted to try to sew them by sewing machine. I admit, I have to stop my fears and to let her to try. It was so easy. 


Spending time with kids and teaching them simple abilities is important. I like to create memories. 


The dolls are pretty now.


Ema and Eliza


Sunday, October 23, 2016

How to make curly felt hair for a doll

It was a challenge for me to make curly felt hair for a doll. Not easy, but I found a way. I searched on the Internet and all the pictures and the tutorial I found were not  for my project. So, I made my own curly felt hair. Here it is an easy tutorial with pictures. Maybe it will be useful for you too. 


You will need: a ruler, needle and brown thread, brown felt, a pencil or a no 6 hook. 
Cut one very long brown felt stripe or cut two stripes if you need long hair. 


Make a know and sew the corner of the stripe. 


Wrap the stripe around the hook just 2 times.


Sew the both stripes together ...


and make a knot on the second one to secure the thread and to prevent to unfold the stripe. 


Wrap more ... 


... and sew the stripes two by two, making on every line a knot. 


You will have something like in the picture. 


Take out the hook and you have curly hair. 


Let the stripe to twist itself. Sew it on the doll.


Best,
Ema 


Penguin Toy

A new penguin toy in my collection. Soft and fluffy, I made him from two different fleece. My daughter said that fleece from his belly is a...