I use to add lyrics to my felt board. I print the text on a special paper (you can buy it from Avery.com like I did or from other supplier) and then I use the iron to transfer the writing on the felt. You can transfer in this way a text or pictures. If you go online on Avery, you'll find some templates and texts.
You need: special paper for printing, felt or a T-shirt or something else where you want to appear your text / picture, and an iron.
In Word:
-type the text
-choose the size paper to be Hagaki card or Japanese Postcard (100 x 148 mm) if you want to print a small piece (like a normal Thank you card for example) not the whole sheet of paper
-for the first time use a normal paper to print the text and to check if everything is OK
-then insert the special paper, but first set your printer: go in Printer Properties, choose Finishig tab, mark Mirror Image - in this way your text will appear inverted; then print it.
Place your special paper on the felt up side down.
Set your iron - no steam and then press on the paper for 40 seconds.
Until now I made some kitty bags for little girls. They love the adorable white face with a bow or a flower. My bag has a long handle and they can carry it on the shoulder. And believe me, it's resistant: my 6 years carried in it 12 rocks and some accorns :). You can wash it in the washing machine.
A pinata is a very known and cheerful toy for a party. Kids love it. I don't really know why. Maybe because it's colorful, or maybe because they have to break it, or maybe because it's fill up with candies. Or maybe all !
So, I had to make one for my 6 years old daughter. I researched on the Internet and I found many tutorials. I liked very much a video: How to make a pinata.
Here are my pictures. Maybe they will inspire you. It's really easy to make it, but you need time (3-4 days) to let it dry well.
First, blow a balloon. Make a mix with 1 cup of all purpose flour and 2 cups of water. Tear some newspaper strips. Put the balloon on a bowl to stay without moving while you add paper layers. Add the first paper layer: put the paper strips in your flour mix, wet it well, and put on the balloon. Be careful to cover all the spaces and your strips to cover each others. Let dry one day.
The next day you'll notice that your pinata is soooo strong ! Add another paper layer.
In the third day, add another paper layer. Let it dry one more day.
In the fourth day, deflate the balloon and take it off.
Decorate the pinata with colored paper.
Here is a video about how to add colored paper layers. I made it with another pinata, not this green one, but the technique is the same.
This is another video about how to add more layers on the top.
After you finish to add colored paper, you can decorate your pinata with punched shapes. I choose flowers and butterflies.
Here is my video about how to decorate it.
Hang on the ceiling and .... break it.
After you break it at the party, you can use it as a hat too. Funny!
Try to make one for your kids party or just for fun. If you have questions, leave a comment. Have fun!
Cheerful and bright - green, yellow and orange. Flowers and butterflies beads. That's all. But the result is fantastic - a great combination for this banner. SARA Name Banner - from colorful felt.
I like to work with felt. It's soft and the colors are bright.
It's perfect for a girl room - it will bring the light and hapyness.
Because children love to see their name. And my banner can help your little girl how to spell her name too.
And it's perfect as a gift. Or as birthday banner.
Custom orders are always welcome. You can choose other colors and tell me to make other names. Check out other name and colors combination in my Etsy shop
Yummy chocolate with strawberry filling. But now ... it's about my crochet slippers. I made them with brown yarn, a pink edge and I attached a pink bow.
Need a pair? Grab a hook and learn to make them. I design this pattern. You can use it - it's just a pattern and it was a pleasure for me to make these slippers, but please share my page.
r1 - chain 5, sl st and make a ring
r2 - 8 sc into the ring
r3 - 2sc in each stitch - you have 16 stitches
r4 - 1 sc, 2 sc in the next, repeat till the end - now you have 24 stitches
r5 - 1 sc, 2 sc in the next, repeat till the end
r6 - 1 db crochet in each stitch
r7 - r 15 - 1 db in each stitch, ch 1 and turn your work
Measure on your foot to see if you have to start to make only the sole.
r16 - db in 26 stitches (in the middle you have 8 stitches), ch 1, turn
r17 - db in the first st, 2 db in the second, db in the next, 2 db in the 25th st, db in the last, ch 1, turn - this row is for increasing your edges
r18 - db in each stitch, ch 1, turn
-alternate rows with increasing ( as r17) with rows without increasing (as r 18), until you finish
-I made in this way 13 rows; fasten off; sew or crochet together the edges for the heel.
For the pink edges - attach the pink yarn in the back, at the heel, and make a ch 1. Make sc in each space you found along the edges.
Attach a pink bow in front.
This is a project for beginners. You can make these slippers in 2-3 hours.
They can be a great gift for a lady.
If you have any questions, please leave a message.
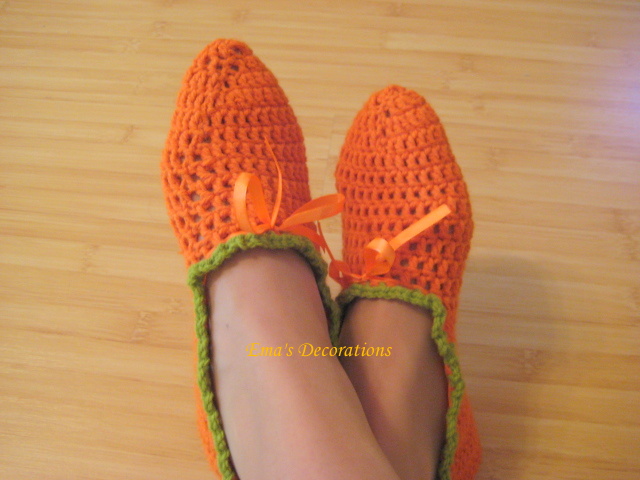
I love shoes, especially comfortable shoes. I like slippers too. I like to be funny or colorful. For this reason I crochet these orange slippers. They are so optimistic! I like to wear them all day long and they cheer me up.
If you want to say that they look like some carrots ... I'm agree. Maybe I'm carrots fairy !
Orange and green are great together. And the orange shiny ribbon gives a delicate touch and help me to fix them on my feet.
I'm searching for more delicious and optimistic colors combination.
If you want a pair too for yourself or for somebody else, you can buy them. Just click on the button on the top of the page and leave a comment with your size (or your colors combination)


.JPG)
.JPG)
.JPG)
.JPG)
.JPG)
.JPG)
.JPG)
.JPG)


.JPG)
.JPG)